scrappystickyinkymess


16 Comments

WOYWW 765 – can it be??

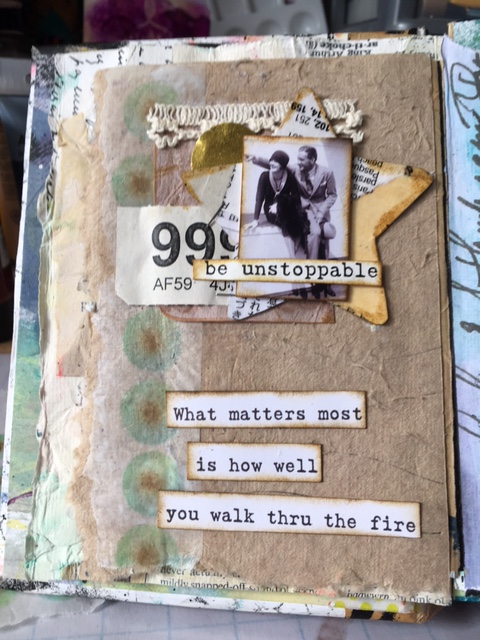
Happy WOYWW! Last day of the month and into a Leap Year February tomorrow. Shocking, as I have mentioned many times how badly I hope to get back to art journaling, but believe it or not, today there is the beginning of a page on my desk.

A few weird things about it – firstly, it is in the so-called pouch I made for a Fodder School class. Second, it uses a bunch of scraps that could have gone in the bin, is build on a deli-paper page, and lastly I really am excited to work in it. I’ll probably expand more on what prompted it tomorrow as while you are reading this I am likely in my very least favourite place, the dentist’s chair, finally getting the broken tooth sorted. I am well tired of adding the temporary fillings every few days and trying to remember to chew only on one side of my mouth. Of course, as seems to be my habit recently, it means I could be out of commission for Weds. visits. So annoying. I will get there, promise.

Not a lot else other than Poppy. Interesting shot of her sitting on Darling Daughter’s lap. Not common at all, despite encouragement from me to hop on and DD making said lap as welcoming as possible. 

More interestingly, Poppy has been spending time in rooms that she has always avoided. They share one thing. Both places have not-used, but not-blocked, fireplaces in them. Poppy seems to like sniffing the air from outside but thus far has not tried to climb UP those chimneys. I may have mentioned in the past we have not one, not two, but EIGHT fireplaces in our house. Two are blocked at the top, and none of the rest of them get used. With any luck we might manage to build a proper Catio for Poppy, one where she can come and go outside as she pleases in any weather, but we will see. We have a massive tree that needs attention, some painting and organizing we need to do, a visit from the in-Laws and a wedding this year so …

Wish me luck on the whole tooth thing – it has been a long and annoying few weeks waiting for this appointment. While I’d hope it’ll be straightforward, if lengthy, it’s just my hope, not a guarantee. 

Happy WOYWW to you all!


Leave a comment

A bit of SWAP fun…

I have mentioned that I am a member of The Roben’s Nest, which is a monthly subscription thing with Roben-Marie Smith. I’ve always loved her loosey goosey style and her colours and just so much about her art. I’ve made painted papers, and journals and lots of fun things from her classes before. The Transitions Journal is one of my most favourite all time projects ever. I still work in it when inspired to – this is my most recent page in that.

Well the first ever swap has been organized and I have been matched with a lady in the USA (I don’t mind the international mailing but always worry it won’t arrive and I’ll be considered a risky partner, which would make me sad) so have been arranging the goodies and creating the envelope. If you saw the post about my colour-challenges flip side of the Fodder School class, these colours will not surprise you LOL! They were on my desk…

So the thing is, while I wasn’t crazy about them for the flip side of the pouches, for this project I really like the brights and the neons and the extra stencils. The swap goodies were meant to be off-cuts from our patchwork papers but I didn’t make too many of them originally. I added what I could from that project and also the really pretty piece of wax-massaged printed paper (from one of my scanned pieces of painted paper) and a scrap from the stuffed heart.

I almost added a partially sewn heart like this but settled for the paper instead, in case my swap partner had a better use for it.

I think it is a nice array, although I probably exceeded the weight suggestion.

I just hope my swap partner likes it – and also that she sends something back and it makes it here. I recall a circle journal swap I did many, many ears a go where virtually every one of the journals at some point went missing. One person did find one that was UNDER their wheelie bin (as a “safe location,” but that location not shared with her by the postman) and I think one other one eventually arrive months later, but after that we all just kinda gave up on the idea. Shame too as I made a fab flag book using a large fish-shaped greeting card as the idea for the journal. I wonder where it is now? Landfill would be my guess.

Mail art is fraught with pitfall but you just need t sing “Let it go, let it gooooo…” and hope, always, for the best.


2 Comments

For all the Book Folding Fans

I have been looking for the best way to add a resource for people who want to create their own book-folding templates, of the lots-of-lines style that I make.

This simple method is one a lot of people seem to find much easier that then usual. I have tried a couple of options (the most useful one being the page of lines I added for people to download, overprint, and use as their template) but the black word makes the lines harder to identify, I think.

Or maybe people just don’t want to do the DIY version but prefer to have me do it for them – which I still do and still for free. So I get that, I guess.

The problem is that I make the templates using that wacky old program called Intaglio. For whatever reason, the spacing of the lines is spot on to produce a great fold. Here is one a follower shared with me:

I have had so many people contact me over the years and ask me how they can make it work in Photoshop. And despite doing all I could to explain and them taking their Photoshop knowledge and applying it to the problem, no one has ever come back and said Hey! This worked!

As I have been playing a lot with Affinity, and especially the pattern-making. I tried a few things, thinking if I could make the specific spacing of the lines from the fill pattern in Intaglio (which I think is a relation to maybe a CorelDraw pattern? Who knows!) then that could also work. And there has to be an easy way to s t r e t c h the word before you fill it, to get more lines per letter.

So I came up with a process for Affinity, although you will have to sort out how to make it work in Photoshop if that is your program.

First, you need one of these:

I tested it and you SHOULD be able to download either the LEFT image for A4 or the RIGHT image for US-Letter and use it to fill your word.

The process is not difficult but has a few steps:

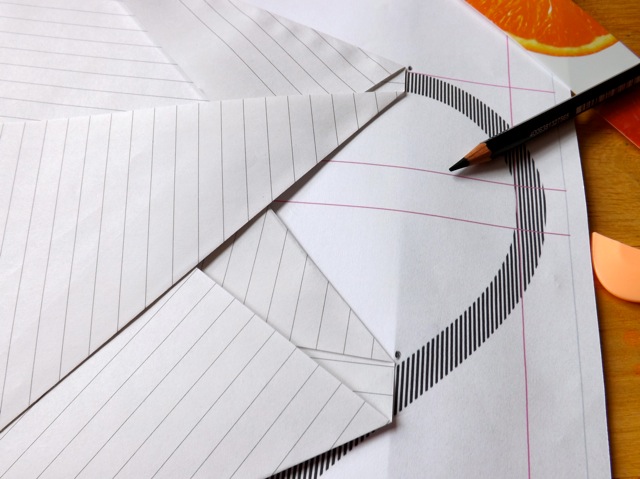
First, type the word and rotate it on your canvas. Position it as below. Drag the bounding box around the word so it is snug around the letters.

Next you will need to CONVERT TO CURVES – this is important for you to be able to stretch the word.

You can GROUP the curves into one item, but you don’t have to – you can stretch the word as a group. I usually try to stretch the word from top to bottom.

Now just position the sheet of lines BELOW the stretched letters and MASK TO BELOW.

This will fill your black letters with the pattern of lines. Your final sheet will look like this – almost identical to the sheet you would get from me, minus the lines that might help you count easier. 

And there you go. You can now make as many different book folding templates as you like! One of the busiest times if the year for these is Mother’s Day but also Prom-posals! I cannot count the number of earnest young men who have contacted me over the years wanting PROM? as a book fold! I even did a whole PDF of seven different font versions. I think the guidance on those might have been to fold both the BLACK lines and the WHITE SPACES between the lines to make a really full and fat fold. but it’s been a very long time since I did that…

I would like to say I hope no one takes my freely give work and tries to capitalize on it by charging people. If that happens let me know. I will always make free folds so long as I can keep using my program. One more upgrade to my Mac OS and it might not work.

If you try it, in Affinity or Photoshop or any other program, and it works (or does not work) do let me know!


4 Comments

Done – one, pouch, one not-pouch.

It feels like I have been working on this FS class for-EV-er. But I am finally done. I think there is a watercolour lesson that was in the same month (lost track of what month that was LOL! November maybe? Yikes!) that I have not tackled yet, and the January class is a really cool one from Megan Quinlan, and I am very excited to work on THAT one, so glad I’ve made progress.

Unsurprisingly I turned one of the junk-mail pieces into a …let’s call it a journal. Sadly it is bigger than my usual monthly journals and cutting off what I would need to cut off would ruin the shapely flap so I can’t use it for that. I think there is a project for The Roben’s Nest that I might can use it for, we’ll see. Annoyingly, I left the part of the piece that would have been hidden had I made it into a pocket unaltered (i.e. still the ugly colours) so It’s on show but I am just going to be OK with that.

Simple pamphlet stitch, which by now I am 100% sure I’ve memorized and don’t need to look it up, even the 5-hole version. I used some coffee-dyed papers and deli-paper I had kicking around. I am interested to see how well the deli paper works for an art journal. Might suck, might be OK.

The other piece I gave up and made into a pouch. Even though I am pretty sure I don’t need a pouch, I did have the (I think) genius idea to just stick it to the back cover inside my Fodder keeper!

It fits the space pretty perfectly and I guess the pocket can hold some stuff and I could stick an envelope or two small ones to the open area.

The colours work OK with the FK colours so again, I am OK with it. If I get any use out of it at all I will be happy. I enjoyed making it, liked using my new stencils, and overall, I think I might use it again. But honestly, it isn’t like I don’t have enough paper and card that I need to resort to using junk mail in order to make things. I am OVERRUN with paper and card. I could make a journal a day for the 100 Days project and still have way too much. So yeah, fun project, liked my final pieces well enough, but this was not one that changed my life IYKWIM. The taught technique for the decorating was one I have done 100s of times before, so even that part wasn’t new to me. But hey, it was November, and with our trip that month, Xmas ahead and all that it was pretty welcome, I guess, not to have to stress about some complicated class. I have to look at the December class but it might just be another collage one, which I might shelve and crack on with the January one instead.

I will never commit to this much stuff in one year again. Too much inspiration is just as bad as not enough LOL!


Leave a comment

Fairly happy – more layers, always good.

Well I am pretty happy so far. The ugly colours that totally did not go with the fronts are gone, or if not gone, then at least only peeping thru in a not-obnoxious way. The first layer, of white, made a huge difference.

After that it was more layers of the right colours and really it was the stenciling that made the biggest difference to my eye. I think it always does.

I am looking forward to turning them in to something useful, I’m just not completely decided on what yet, I think I am still leaning towards some sort of booklet/pamphlet sort of thing, sewn in or insert, I don’t know, but also, the two pieces are kinda the same size, at least one dimension, so I feel like there is potential there to do something interesting and not just make them a storage thing. 

IDK. In one way I feel like I am slightly overrun with books/booklets/pamphlets. I adore making them but I have a fair few that are empty. There is not enough time in the day to use all that I already have, so is making more crazy? I might be…


8 Comments

WOYWW 764 – work to be done here!

Happy WOYWW! I still have that shocking colour catastrophe on my desk today, showing the good side. You’ll have to look back to see the awfulness I am trying to correct. I also have a selection of paint that I think is what I used to create the nice parts.

I really need to fling a bit of it about in order to make the reverse match, even kinda, so I can carry on and complete another Fodder School project. Although they are meant to be pouches, I’m not sure I have any use for pouches, as I said. I am finding that while a totally organized craft room, with loads of stuff stashes away neatly in boxes, bins, notebooks and binders may LOOK nice, for me it is not at all conducive to actually getting stuff done!! I work much better and more effectively, if everything is within my arm’s reach. So a pouch to hid stuff away in is not what I need. I’m thinking I might make them booklets, or at least add a signature to the inside. I’ll have to see,

Poppy is staying well away, as I fling paint about. She looks like she has been woken from a sound sleep here, and maybe she was, I forget. What I do know is this position, what I like to call The Poppy Drape, is one of her favourite ones. SO many photos of her, murder mittens out, and flopped over the edge of something. 

At least she is against a white background so you can really see the cute…if you overlook the plotting clearly going on behind her eyes. LOL!

Is it crazy I am already planning my ATCs for the Anniversary? I am! (wink)


2 Comments

Pouches – useful or not?

I am finally getting back to my Fodder School class from ages ago, which involves making pouches from junk mail.

I think I was pretty unsure if they would be at all useful to me. Also I never get even remotely interesting junk mail. I mean AT ALL. It’s all just thin, basic, uninspiring. I did bring home a few items from my Dad that were at least more than the basic folded sheets, but still not super interesting.

I was happy enough with the beginning of it. And pretty happy with the next layers – where I got to use some of the Joggles stencils I also brought back form our trip.

But then I have NO IDEA what was in my head when I reached for some totally different colours to work on the inside. I mean blinkin’ ‘eck!

Not even remotely good as a match for the fronts!! Clearly I am currently colour-challenged. I blame the fact I still have a week to wait for my tooth to be fully repaired, AND that I will be starting on a new medication with some nasty side effects that I can only hope I don’t get. My SINAM myositis is very much flared up at the moment, I am feeling way weaker than I should and pretty exhausted all the time. Ugh. Moan over. I will grab some paint, layer on more and more and more and eventually with luck it will get to where it needs to be. 

What I will do with it after that? I am not entirely sure. 


3 Comments

Calendars, but trying something new!

I have been playing around and learning new things about my Affinity Photo program. Had a discussion with my FIL, who makes CD case calendars for us every year. This year, he must have had a similar thing as happened to me once, where he used a calendar example to match that was not correct. Luckily, as I have mentioned before, this is an odd year – only January would be out of what and so long as you add the 29th of February for the Leap Year, the rest of the months will all be back in sync.

Anyway, that got me thinking about a different way to do calendars. I was surprised to find that not only doe Affinity OPEN Photoshop PSDs but it can also EXPORT files as PSDs, layers and all. So I had a go at turning my DIY calendar into something maybe more useful!.

If you have any sort of program that opens Photoshop PSDs you can open the individual months and drop your photo into the file, save and print. Now, when I do this in Affinity, I drop the photo in and position it under the PHOTO layer. You can see it there on the right of the image:

Then I open the drop-down and use the photo layer as a mask.

And once I clip that, the photo I added replaced the grey photo box.

And I should mention that you can clip any size or orientation photo – landscape works too even if it does not fill the box.

Now the other thing to know is you can simply turn off the photo box and you will get the DIY calendar, more of less. Obviously this one is bigger as is, at 7×5 (5×7? What are the rules? Biggest first? Horizontal first? Not a clue!) so that might be something you like. You can also print WITH the box, then cut a photo and add it manually. But also, and I really like this idea, you can fill that “photo” box with anything – like your art!

I know this looks a bit odd floating there in all that white page background, but I think you can get the idea!

Anyway, for a limited time, like maybe till February? Not sure. I would love for anyone who has the urge to test this out and see how it works. And obviously I would love to see what you do with it so do drop me a comment or email me a photo. I would be very interested. I am going to put it up on Ko-Fi as it is a pretty big file and it will be available at this link hopefully near when this post publishes!

I really hope to get some feedback on this as I will do more if people like them. It’s alllll a learning process and I love to learn.


5 Comments

Sigh. Not a success.

Yeah so the ribbon binding worked, but not as well as I had hoped.

The problem MIGHT have been the extra space I added as “ease” using the paper clips.

It looks great.

The central blue thin ribbon is very long, creating a wraparound tie. I love the rows of ribbon, rather than the original version where the ribbon wove and carried on till the ribbon ran out, when a new one began. The problem is that while, yes, I can open the pamphlets to see the covers, it is just not as stable as it could be.

Open, it looks ok-ish

But when you open the pamphlets it all goes a bit wonky. and it slips into disarray easily.

I can see how, had I stuck the pamphlets to each other as in the original, it would have been an all together more stable structure! That was easy to model with paper clips

and it opens perfectly well and lays flat with those in place.

So I am left with a dilemma!

  • Use the book as is? For something…but what?
  • Do I stick all the pretty pamphlets together to make a more stable structure?
  • Do I cut the ribbons and un-weave them, leaving me with two pamphlets that have ribbon on them and four that do not? Use them as small books for … something else?

Honestly it is such a lovely colourful thing. I learned a whole lot making it, and know I could easily make another one if I wanted to just make two pretty decorated pamphlets for 2025 and bind them at the end of the year. But it is not going to work to bind my 2024 Daily Journals after the fact. Which is fine, I already have the book I have gutted to make the holder for Jan to June, using the same method I used for the July to Dec. ones from last year. It was pretty easy, I like how it works, and I can make two the same. OR I could find another bigger book or maybe expand the spine on this one to bind all the year in one. While I think that may be too fat to deal with, it is a possibility. I think I will see how I feel about it in May!

You may still see my version of a Pamphlet Palooza book in the future, who knows?


3 Comments

The ribbon binding.

OK so here are the pamphlets

and here are the ribbons

I have them loosely laid out in the order I will use them but it will undoubtedly change as I add them. The method, from what I can glean, is to weave the ribbons thru the threads of the pamphlet stitches in each of the pamphlets. Easy enough. Not here is the alteration: in the original the pamphlets are stuck together. Obviously I do not want to do that, as MY pamphlets are decorated on the covers with the month and year. So I am not sticking them together but trying to bind them using the ribbons. I’ve wedged a jumbo paper clip between the pamphlets to give them some room. I am flying by the seat of my pants here, cause I really can’t sort out without doing it how the spine will operate in the end!

I found that clamping the whole book together made the weaving of the ribbons a lot easier. It did pop the binding edge a bit so the paper clips might not have been needed but I wanted to be sure

My thoght was that I could stick the ribbons to the covers to hold the structure together and the little bit of extra give would allow me to open them where the covers were.

I am doing the sides then letting them really dry (using Art Glitter Glue to stick the ribbons) then once it is all dry I will test it. I am worried I am going to be disappointed, based on what “testing” I could do with a structure that was not held together in any way…I’ll know by tomorrow!